

Hey. Been a while. Since the last time I posted, I graduated from two universities and moved to London. Life passes fast, huh? But hey, this is not a rant about the weather, food, cultural differences, the superficiality of relationship in big cities, expensive hockey rinks or whatever. Note how I’m not even pretending any more that I’m gonna tell you in the next post about that super cool thing I’m working on at the moment!
Instead, I’m gonna tell you about paper lanterns! Hey! Hey, no, wait! Hold on, don’t leave! Just a sec! We’re not speaking about your average paper lantern here! The goal of this project is to combine traditional and modern, handcrafted and digital, in short… to make a bunch of programmable paper lanterns!
What The Hell Did I Have in Mind?
Following my obsession for Korean food, I tested a new restaurant this week, and they had these lovely paper lanterns hung on the wall! Food was so-so, by the way… I was struck by the beauty and balance of those objects, by the fact that they had nothing overwhelming about them, but rather simplicity and, well, delicateness.
I am not an artist, neither am I a craftsman. I am a loosy engineer and allegedly, a scientist. I cannot pretend to have the means - in terms of time, competence and money - to reproduce the atmosphere of that place as I experienced it. Besides, I know I’m unlikely to feel satisfied by the creation of a willingly identical bouquet of lanterns. If I try to redo, I will feel compelled to compare, and unvariably prefer the properly-crafted original.
I felt that I would not find the “right” balance of lights and colours. I could not fix the parameters of that bunch of lanterns once and for all and declare contentedly: “This is as good as it can be”. What was left was for me to have a way to tune them… and here goes the programmable lantern bunch!
Rather than figuring out myself what intensity each light in each lantern should be set to, I should just let it evolve on its own. I will setup an Arduino board in order to control the lights, and will setup an algorithm that will randomly make the number of lit lanterns and the intensity of their light vary. It will be tunable so that various levels of dimness can be achieved, while retaining this smoothly evolving aspect that is meant to give life and presence to my lanterns.
Of course, an Arduino opens the door for many other possibilities… Such as using a sound sensor to be able to turn on the light with hand claps. Or tuning the intensity of the lights according to what music is playing. There are as many options available as one bothers to imagine, and of course I’m interested in original ideas about what to do with the lanterns. Feel free to drop me an email!
Prototype #1
This post will be dedicated just to a prototype of paper lantern. Here I’m just looking into the technique and materials that I’m going to use for the production of the bunch. The most obvious is that the following is going to be required. Whenever I figured out details worth mentioning, I do so:
- Soft iron wire
- Paper sheets (A3 at least, 40gsm thickness and homogeneous grain recommended)
- Light bulb (must absolutely emit little heat - LED recommended)
- Lamp holder (I just reused one from a desk lamp for this prototype)
- PVA glue (did not use for the prototype but necessary
I strongly advise you to have cutting pliers, and needle-nose ones. I struggled to bend my iron wire properly with my large tongue-and-groove pliers.
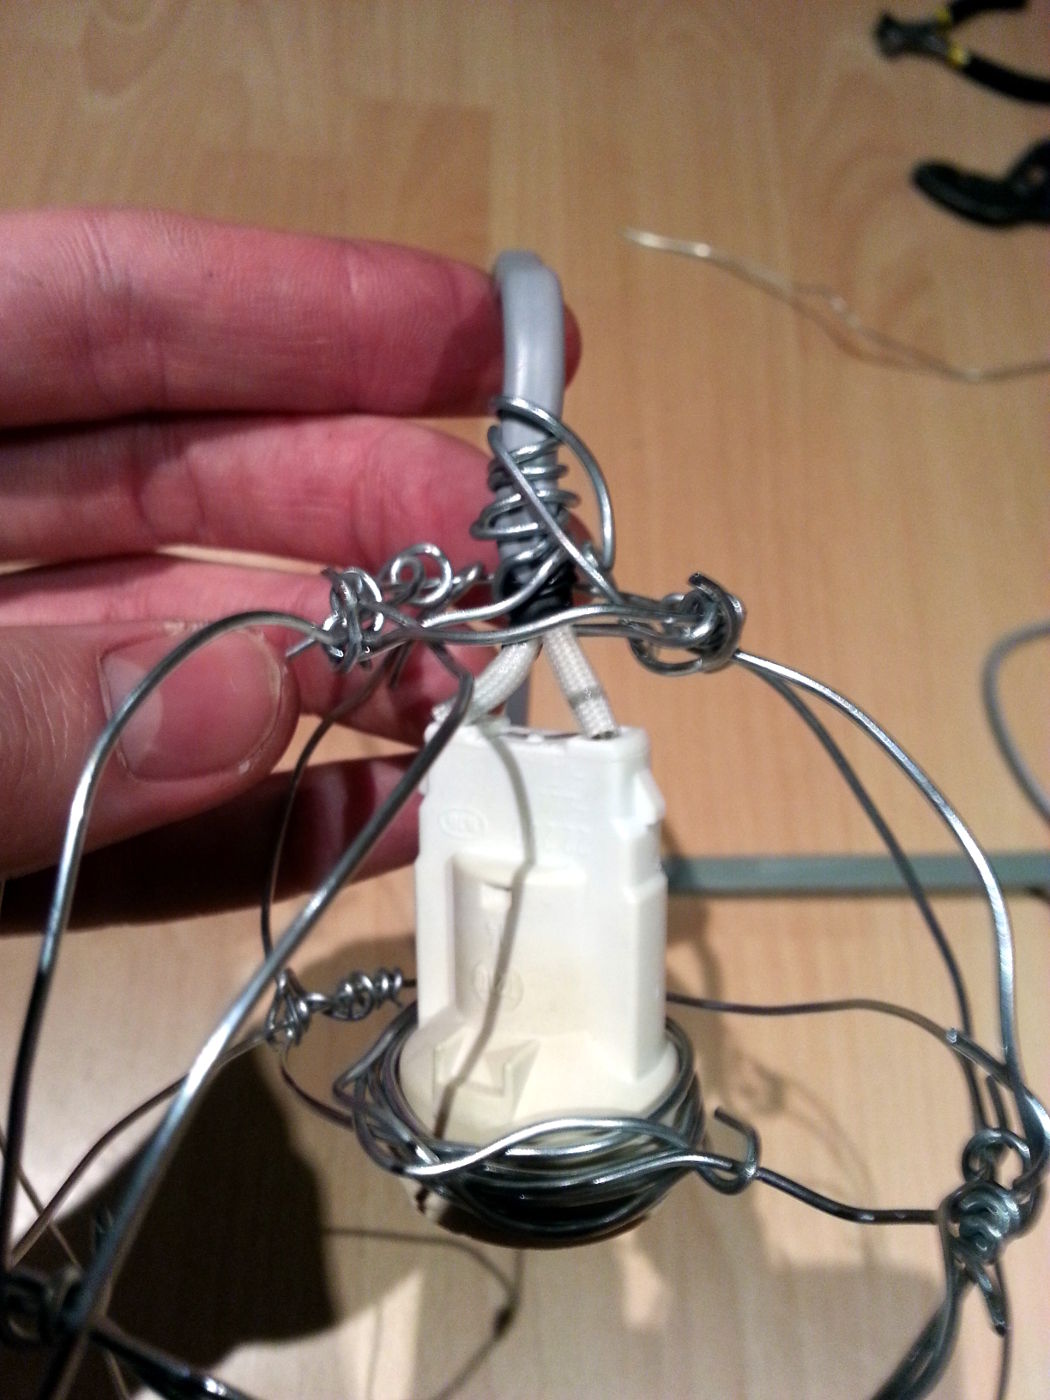
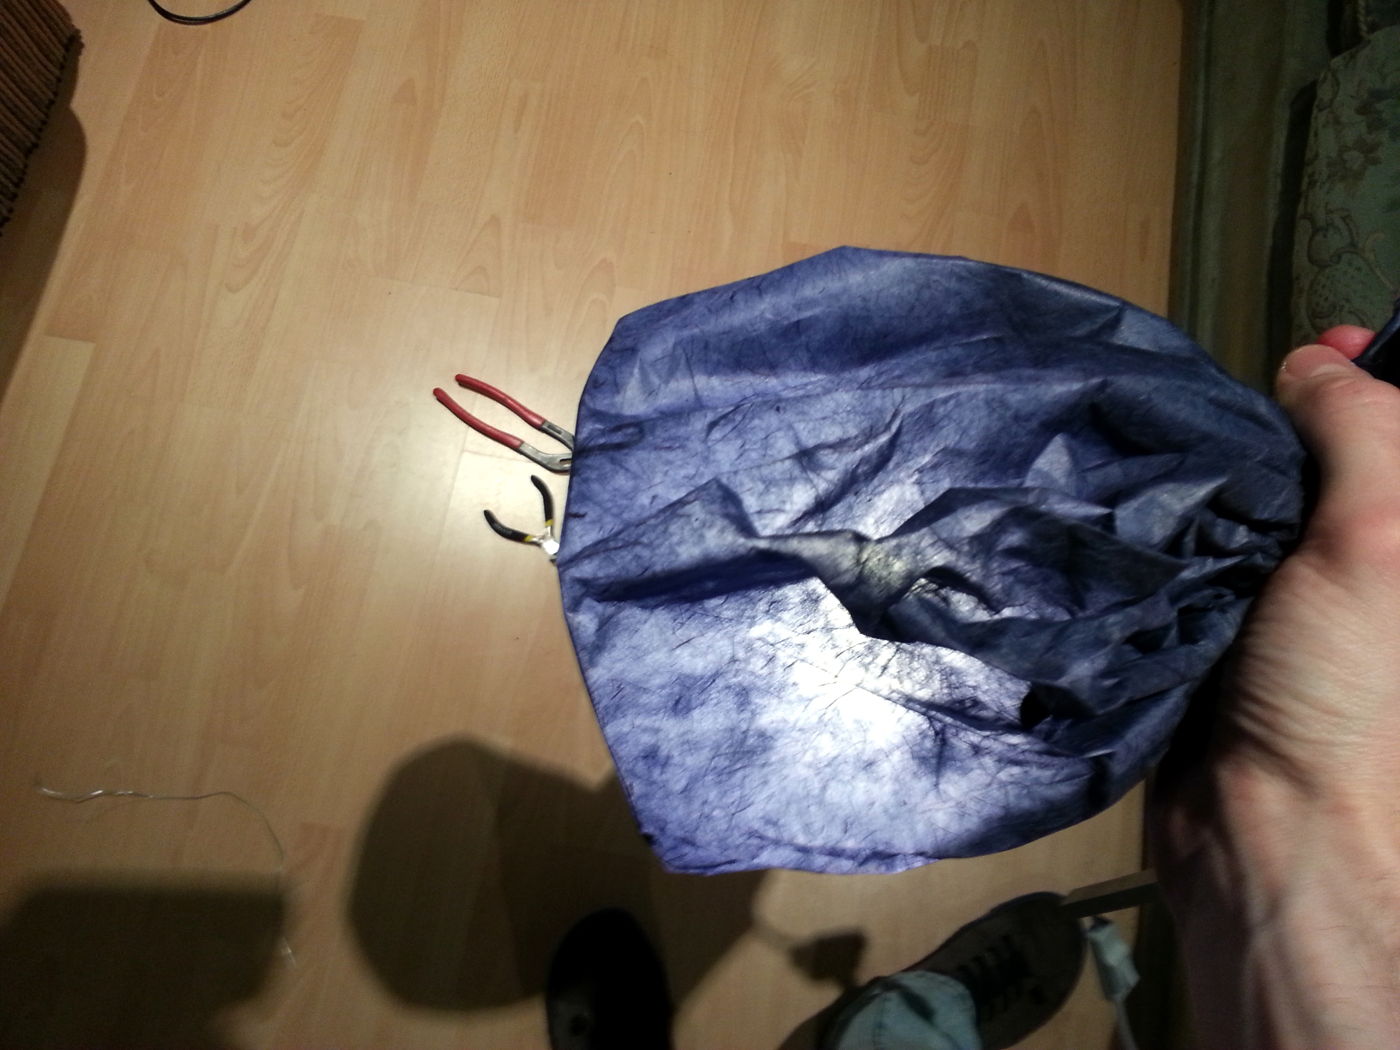
The first step is to bend the iron into a cage that will welcome the bulb. You want to have a circular or square (or FSM-shaped) base, and then have threads of wire converging upwards from different points of the base. This is where you will put the lamp holder. Make sure to leave enough room to be able to insert the lamp holder. In our case, we even want to completely block it at the top and let the power cables out. The reason is that we will have extra paper on the top of the lantern that will hide the holder anyway. I didn’t realise this straight away and so my photos may not reflect this detail properly.
Another thing you want (and then again my photos are betraying) is to have a sort of inner cage around the bulb. The reason is that if the bulb moves a bit because of a loose lantern structure, there should be something to prevent it from entering in contact with the paper. My own cage was way too high as I built it around the holder, ignoring the size of the bulb itself. For my defense, I intend to use smaller bulbs on my final lanterns.
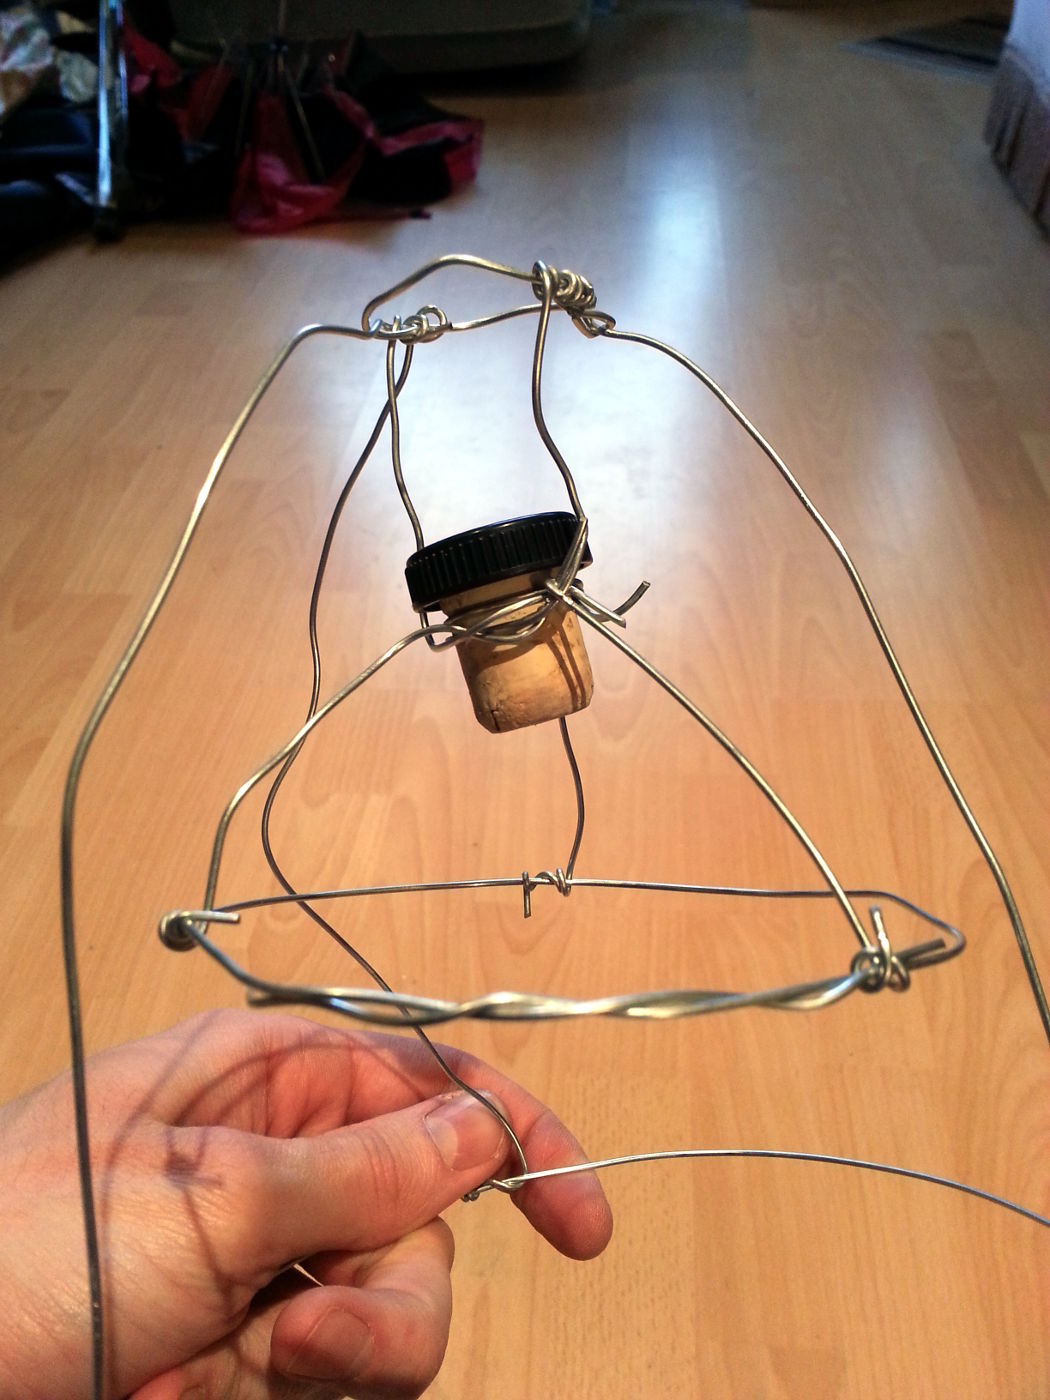

Once you’ve got the cage right, and struggled to insert the lamp holder inside it and tighten it, you have to put the paper on. I’m not yet satisfied with my technique and will be trying something more elaborate tomorrow. The naive approach is to cover the lantern from the bottom to the top, letting the paper fold wherever necessary. Then, you would just attach it with a thread at the top. That creates too many folds and is rather unaesthetic.
Another approach would be to cut strips and then glue them together (with that PVA glue I told you to get a hold of). The inconvenient is that you’ll have to redo the lantern whenever the light bulb dies: mines are not designed with a hole at the bottom! Besides, I do believe that “tight” lanterns are less elegant that the sort of “candy wrapping” ones in that restaurant.
I’m going to explore a compromise between both techniques, by gluing together a square of paper, slightly larger than is necessary, put the cage inside and then tighten it at the top. Hopefully it should leave folds on the surface in more reasonable amounts, and allow for the light bulb to be changed.
Interlude - Le ridicule ne tue pas
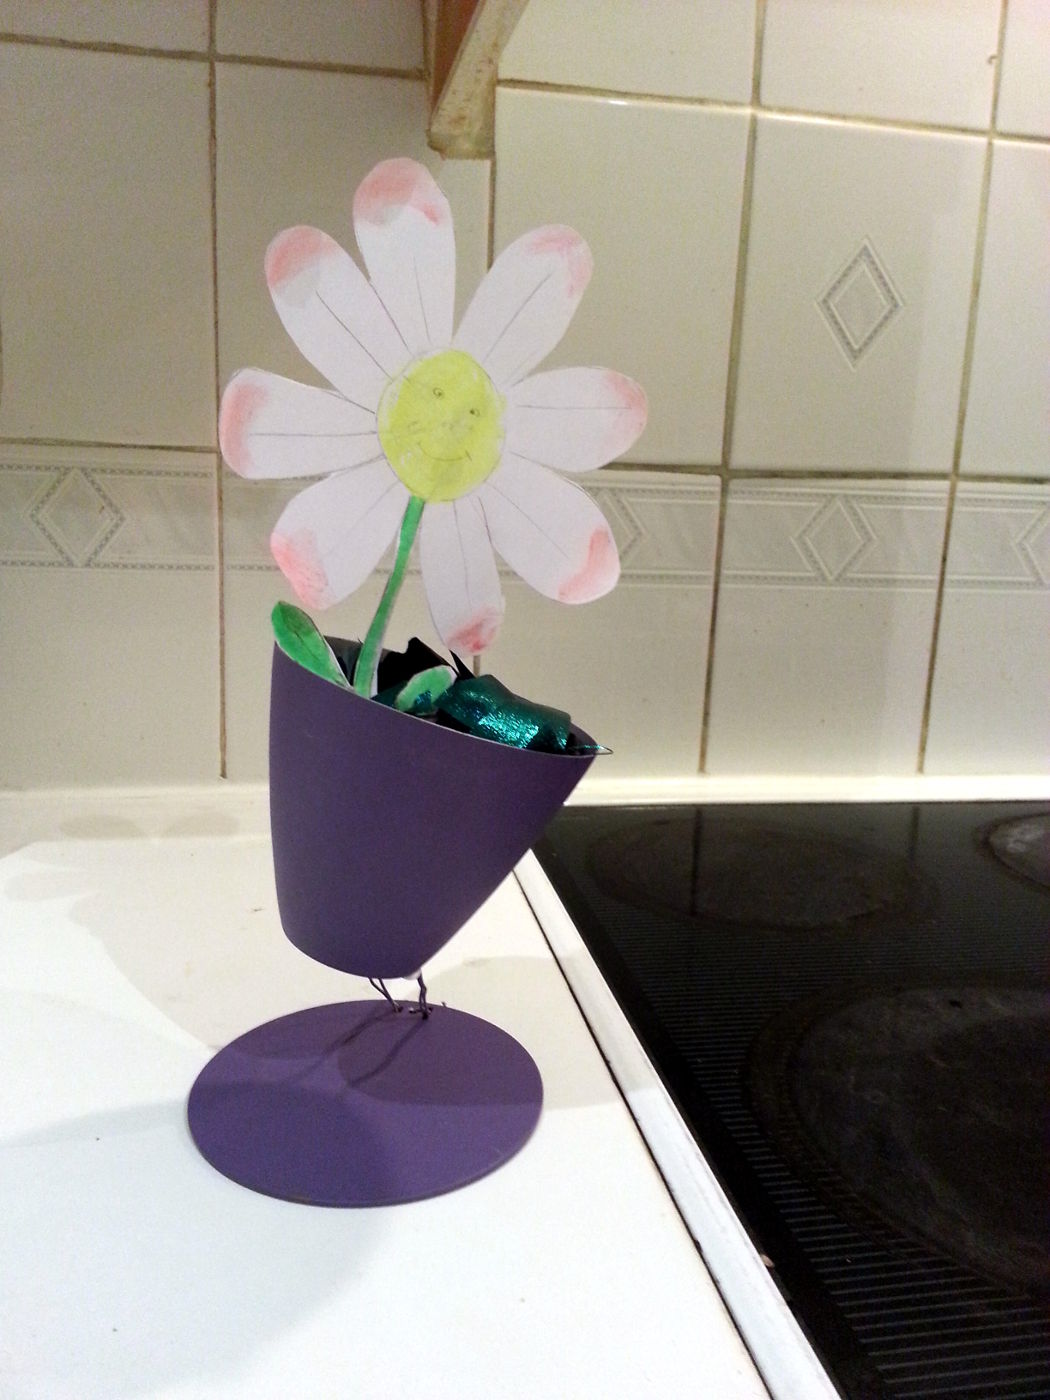
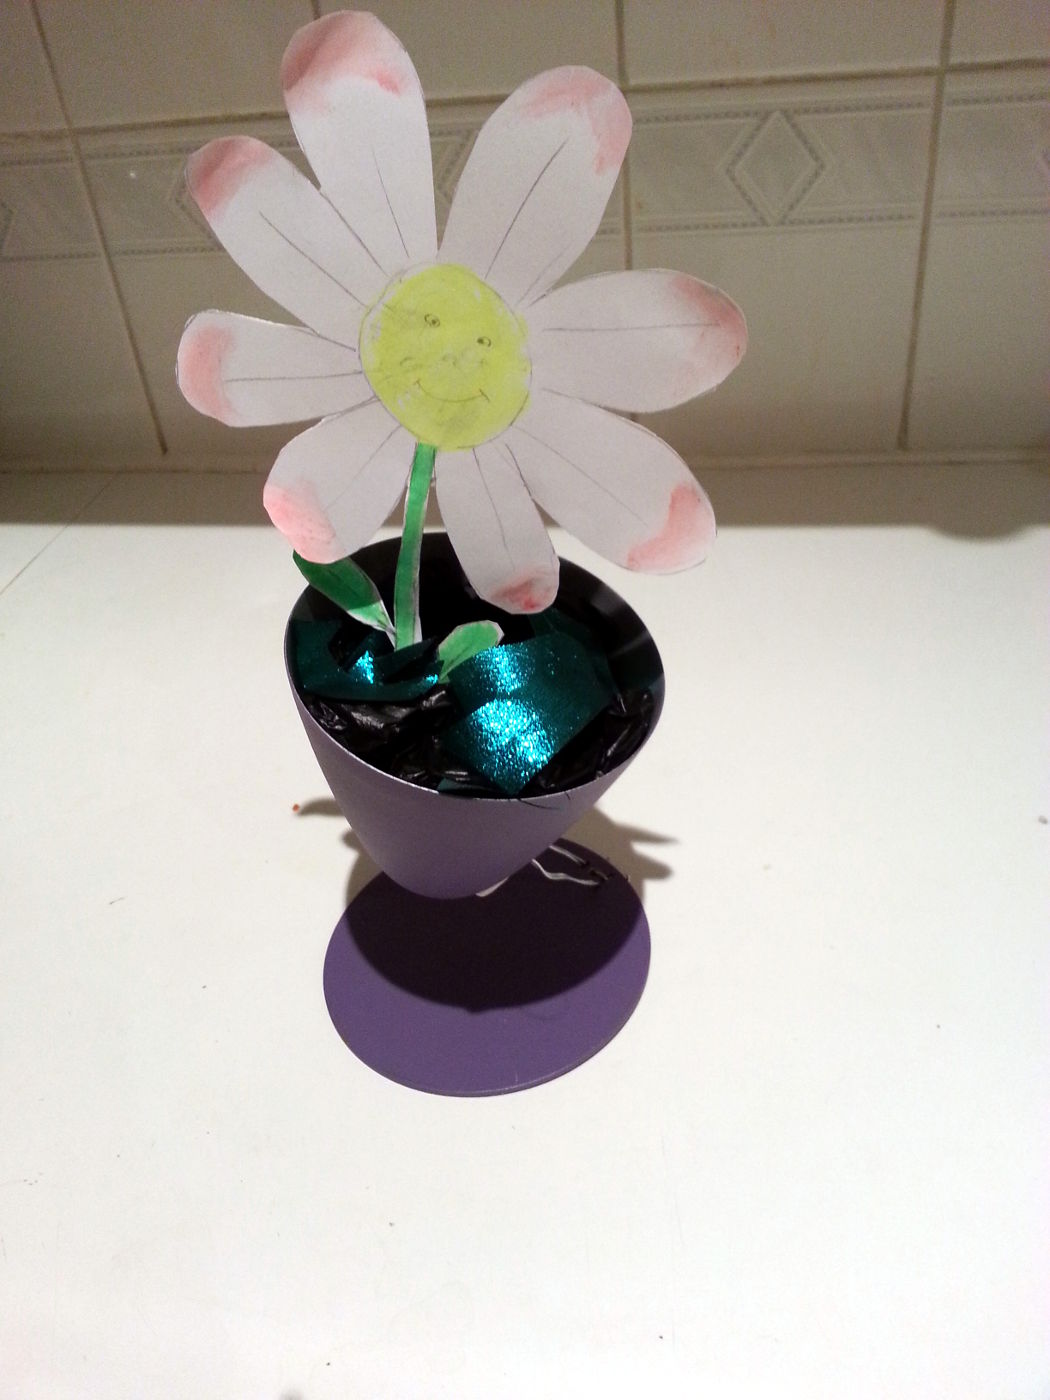
I delayed the purchase of all electronic components as I want Martin to get me exactly what I need, and no more. I don’t know much about dimming lights and Arduinos, but until I placed my order, I still need something to work with. I stole an old lamp of my house mate Lisa, and kind of destroyed it in order to retrieve the cable and lamp holder inside it.
As a compensation for my misdoings, I decided to make her a present out of the remains of her own lamp! Since only the metallic parts were reusable, I turned them into a sort of plant pot, and, obviously, provided my house mate with a wonderful specimen of Bellis perennis… Ahem…
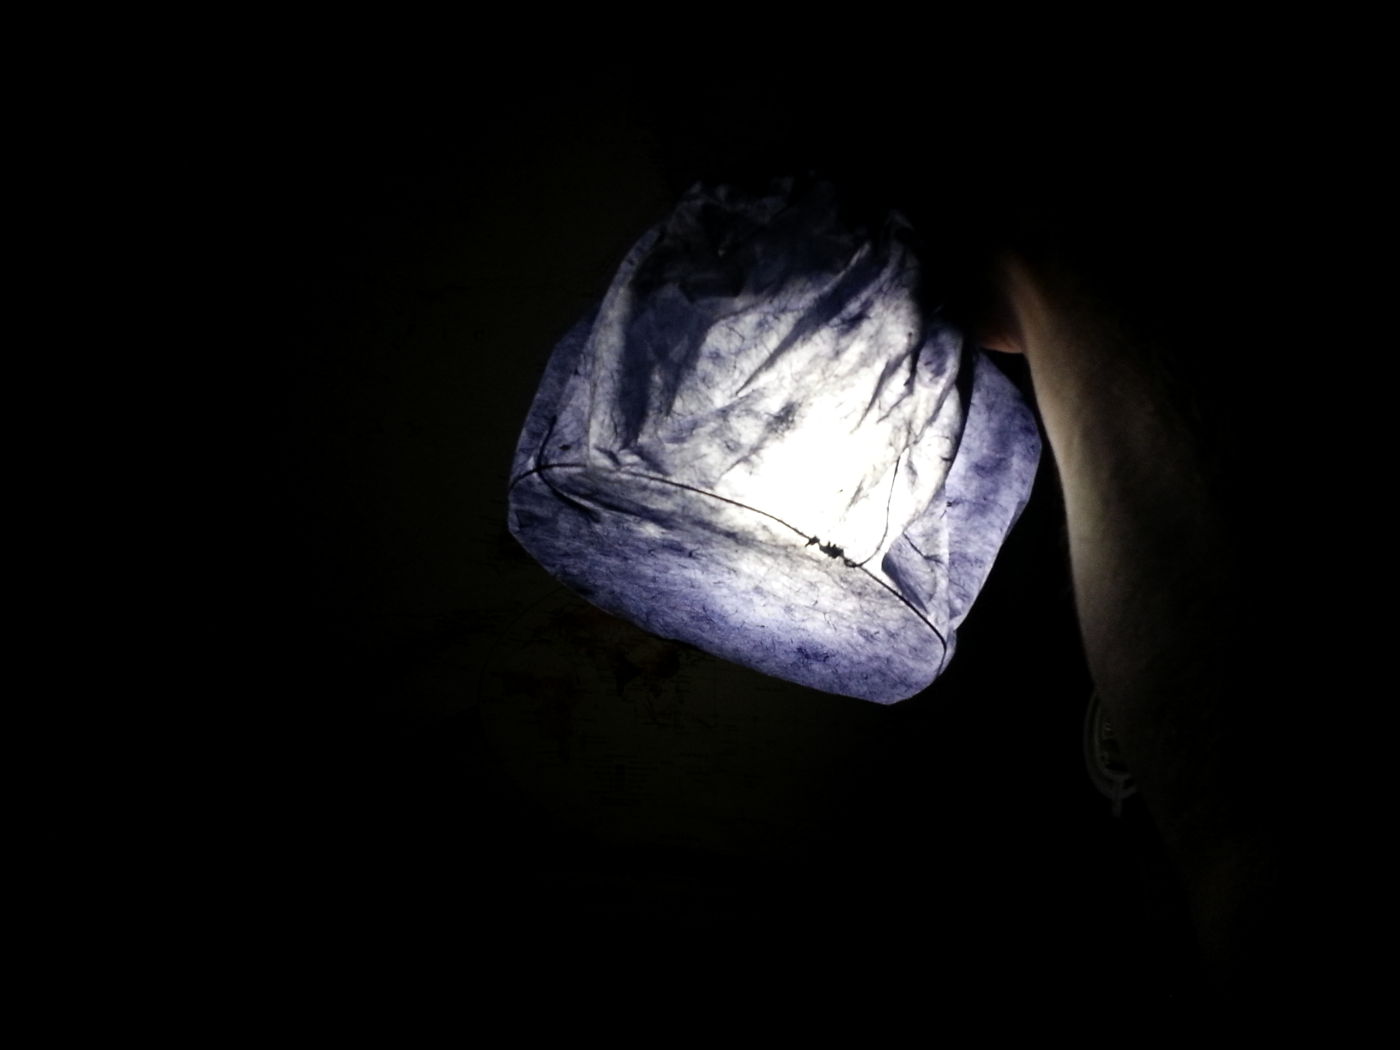
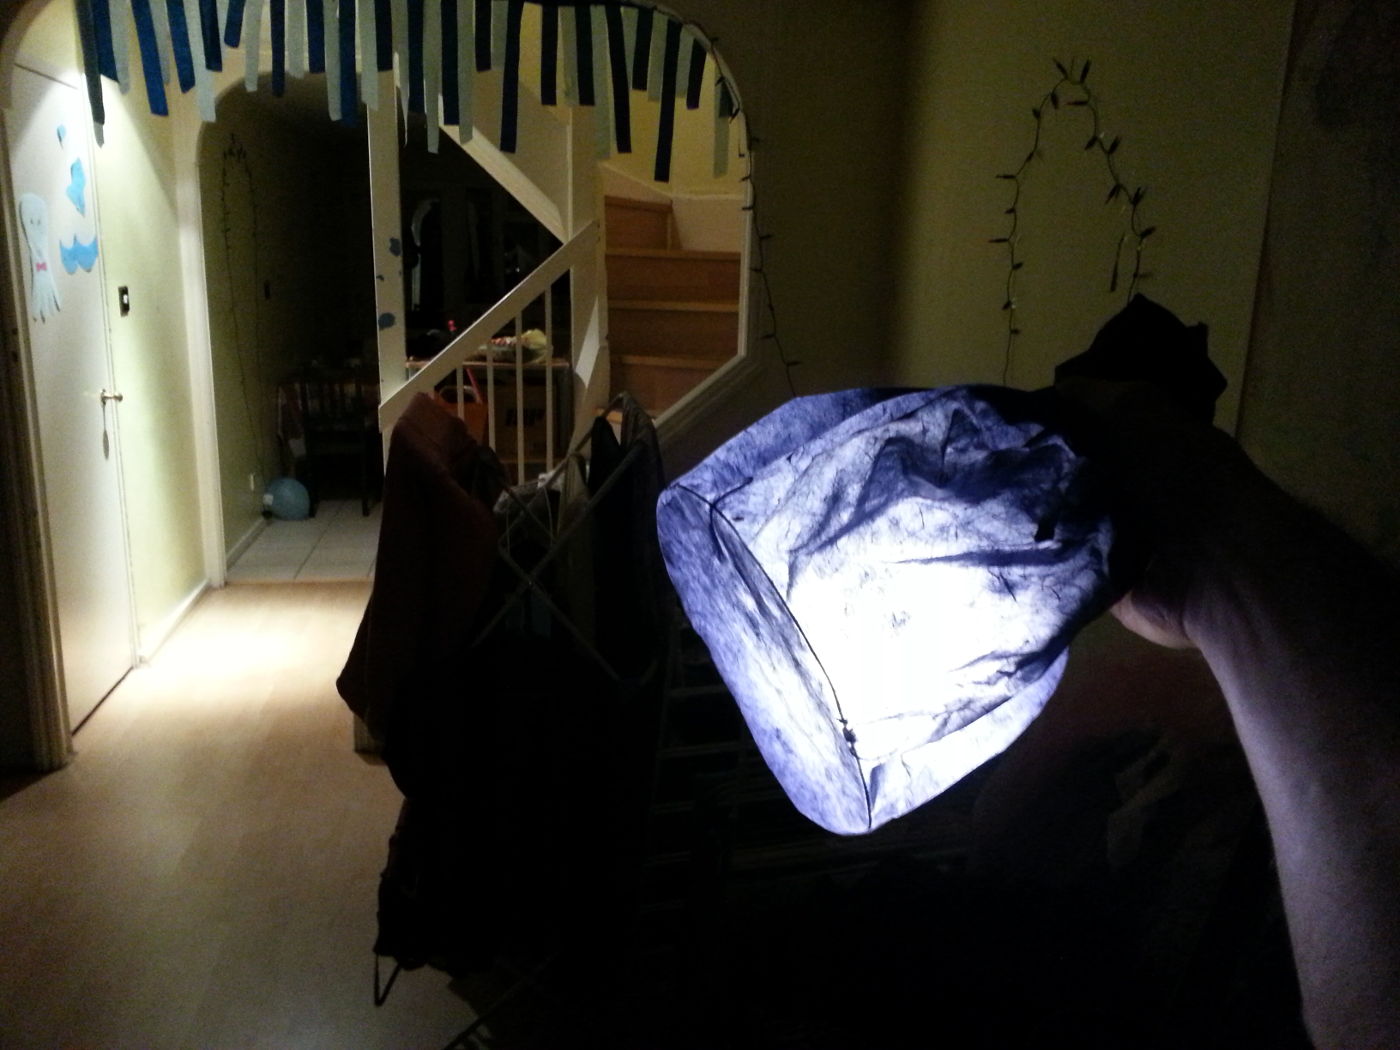
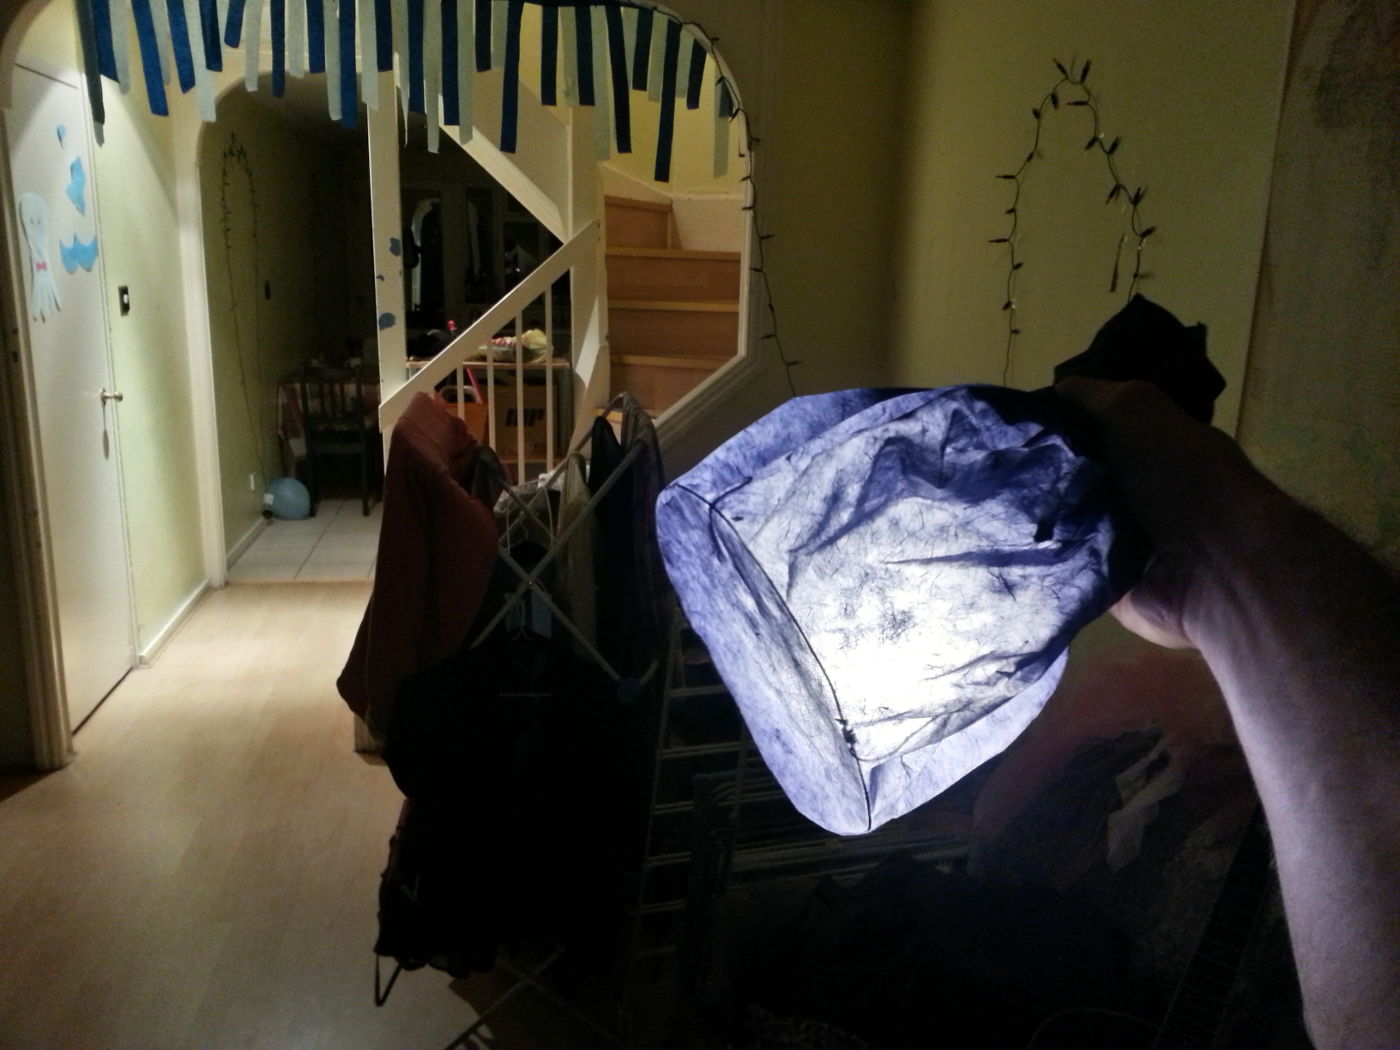
The Result
Here is an idea of what you should expect the lantern to look light. Obviously the focus here was on learning how to build a lantern, not so much on how to make it beautiful or properly balanced. The second prototype will be expected to look much more like those on display in the restaurant where it all started…
Voilà, that’s all for today. Happy Día de la República, by the way!